Happy fall!
This post has instructions for several fun pumpkin themed crafts to try with your kids this year!
*Scroll to the end of this post for a printable pumpkin anatomy freebie!
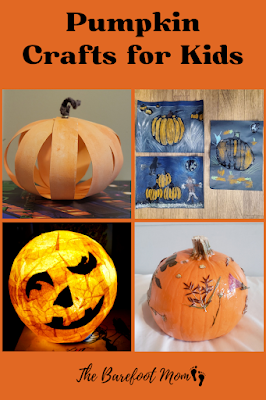
Tissue Paper Pumpkin luminaries
For this activity you need:
-Orange tissue paper cut into squares about 2 inches by 2 inches.
-Black construction paper
-Scissors
-School glue
-A paint brush or a sponge
-A balloon
Begin by cutting pieces for your pumpkin's face from the black construction paper. You will need eyes, a nose, and a mouth. Make them whatever shape you want.
Next mix some school glue with water in a small washable container. You want about 50% glue and 50% water, but it doesn't have to be exact. Fill a second container with just water.
Inflate your balloon and begin placing a layer of orange tissue paper squares onto the balloon and "paint" over them with water using a paint brush or a sponge. Cover about two thirds of the balloon, leaving a space around the balloon stem.
Add a second layer of tissue paper squares, this time coat them with the glue/water mixture.
Glue your construction paper face pieces in place. Keep in mind which end you want to be the top of your luminary (they can go either way- if you make the opening be the top side, your flameless candle will sit inside like a traditional lantern. If you make the opening the bottom side, just set your luminary over a flameless candle).
Add another couple layers of tissue paper and glue solution, then set it aside to dry. Setting it on top of an upright cup works well to hold it while it dries.
Once completely dry, cut the stem off the balloon and let it deflate. It might stick a bit and crinkle the tissue paper, but once you completely remove the balloon you can round it back out with your hands.
Set a flameless candle inside or under your lantern and enjoy!
Pressed Flower Pumpkins
This one is really simple but they turn out really beautiful!
For this activity you need:
-A Pumpkin
-Dried flowers and leaves
-Modge Podge
-A paint brush or sponge
Choose some dried flowers and leaves then stick them to a pumpkin using Modge Podge and a paintbrush. It works best if you apply a thin layer of Modge Podge to an area then stick on the flower or leaf, then apply another layer of Modge Podge over the top.
-Black construction paper
-School glue
-Oil pastels and colored chalk
-A pencil
Start by lightly sketching a pumpkin on a piece of black construction paper with a pencil.
Trace over the sketch with school glue and set it aside to dry.
Once it's completely dry, color in your pumpkin and add detail with oil pastels and chalk.
Cardstock Pumpkins
For this activity you will need:
-Orange cardstock (or if you want to add an extra element use white or beige cardstock and watercolor or paint it orange before you begin)
-Scissors
-A hole punch
-Paper fasteners
-Green or brown pipe cleaners
Cut the cardstock into one inch wide strips.
Spread the paper strips out with your fingers, making a sphere.
Grab a free pumpkin anatomy diagram plus coloring worksheet here:
For more fall themed crafts and activities, check out:
Follow me on:


Comments
Post a Comment