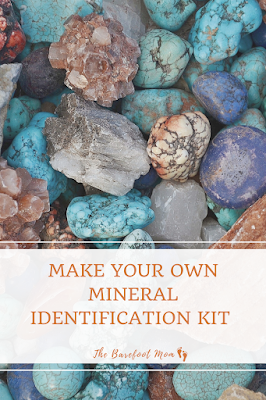
One of my family's favorite hobbies is rock hounding. We love collecting and trying to identify neat rock and mineral specimens that we come across. You can put together your own simple kit for identifying rocks and minerals with materials you likely already have around your home. In this post I will explain how to put together your own mineral identification kit and how to use it to identify rocks and minerals you find on your adventures.
Making a Rock and Mineral ID Kit
Grab yourself a printable Rock and Mineral Journal for recording your observations here: Printable Rock and Mineral Journal, and then gather the following supplies:
-A pencil
-A coin
-An iron nail
-A piece of glass (an old pocket mirror works well)
-A ceramic tile
-A small watertight bottle or container
-Some vinegar
-A magnet
-A magnifying glass
-A dropper (optional)
-Rock and mineral guide (optional)
-A small container or bag to keep it all in
Fill the small watertight bottle with vinegar, this will be used for the acid test. Then put all your supplies into your bag or container. Your mineral identifying kit is ready to use. Now you just have to go out and find some minerals or rocks to identify.
Using Your Kit to ID Rocks and Minerals
Once you've collected (or bought) some minerals or rocks, you can get started identifying them. There are four tests you can do with the supplies in your kit. The results of these tests, plus some simple observations, will help you identify the mineral or minerals present in your sample.
The Hardness Test
For the hardness test you will need your sample(s), the ceramic tile, the mirror, the iron nail, the coin, and your fingernail. The idea behind this test is a material harder than another will scratch the softer material. Using materials with a known hardness can help you find out the hardness of your sample.
Start with your fingernail and see if you can scratch your sample. Your fingernail has a hardness of about 2.5-3. If you can scratch your sample with your fingernail, your sample is compsed of fairly soft minerals and has a hardness of less than 3. Record your results.
If you cannot scratch your sample with your fingernail, move onto the iron nail. If you can scratch your sample with an iron nail but not your fingernail, it has a has a hardness of about 3-4. Record your results.
If you cannot scratch your sample with an iron nail, move onto the glass. Since you can't scratch your sample with a mirror safely, see if your sample can scratch it. If your sample does not scratch the glass or mirror, it has a hardness of about 5. Record your results.
If your sample can scratch the glass or mirror, move onto the ceramic tile. If your sample cannot scratch the ceramic tile it has a hardness of about 6-7. If it does scratch the tile, it has a hardness of 7 or higher. Record your results in your journal.
The Streak Test
To perform the streak test you need your sample (or samples) and the ceramic tile. This test is simple, you just run your sample over the ceramic tile to observe what color streak it leaves. Most minerals leave a white streak but some leave very distinct colors like yellow, green, or brown. Skip the streak test for minerals with a hardness higher than 7, as they will only scratch tile, not leave a true streak. Record your results in your journal.
The Magnetic Test
The magnetic test is easy, just hold a magnet to your sample and observe whether or not there is any magnetic attraction. Record your results in your journal.
The Acid Test
Some minerals, like calcite, react with acid. For this test, drop a few drops of vinegar onto your sample and carefully observe to see if there are any gas bubbles produced. Record your results.
Once you've finished performing your tests and recording your observations, it's time to move onto actually identifying your sample(s). Using a rock and mineral guide book or an online data base like this one at Collector's Corner, you can now identify your sample using the results of the tests and your observations. If your sample is a rock instead of a pure mineral, it is composed of two or more minerals. You will need to start by identifying what minerals your rock is composed of and then look up common rocks composed of those minerals. Collector's Corner has a good rock database here.
Enjoy your mineral and rock hunting!
Other Observations to Record
Color- record your sample's color or colors.
Luster- luster describes the way a mineral sample reflects light. Some common luster types include metallic, pearly, vitreous (glassy), earthy, and adamantine (sparkly). Check out my printable Rock and Mineral Journal for more information about luster: Printable Rock and Mineral Journal.
Enjoy your mineral and rock hunting!
If you enjoyed this post, check out:
And be sure to grab a printable Rock and Mineral Journal!
 |
| Includes journaling sheets, a flow chart for determining hardness, a flow chart for determining luster, a list of common minerals and their properties, and more! |


Thanks for this. What’s the coin for?
ReplyDelete